Almost everyone has loved working with PowerPoint. Microsoft 365 subscribers can now collaborate in real-time or work individually on a project. The latest feature allows users to track changes made to a presentation when you send it out.
How to Track Changes?
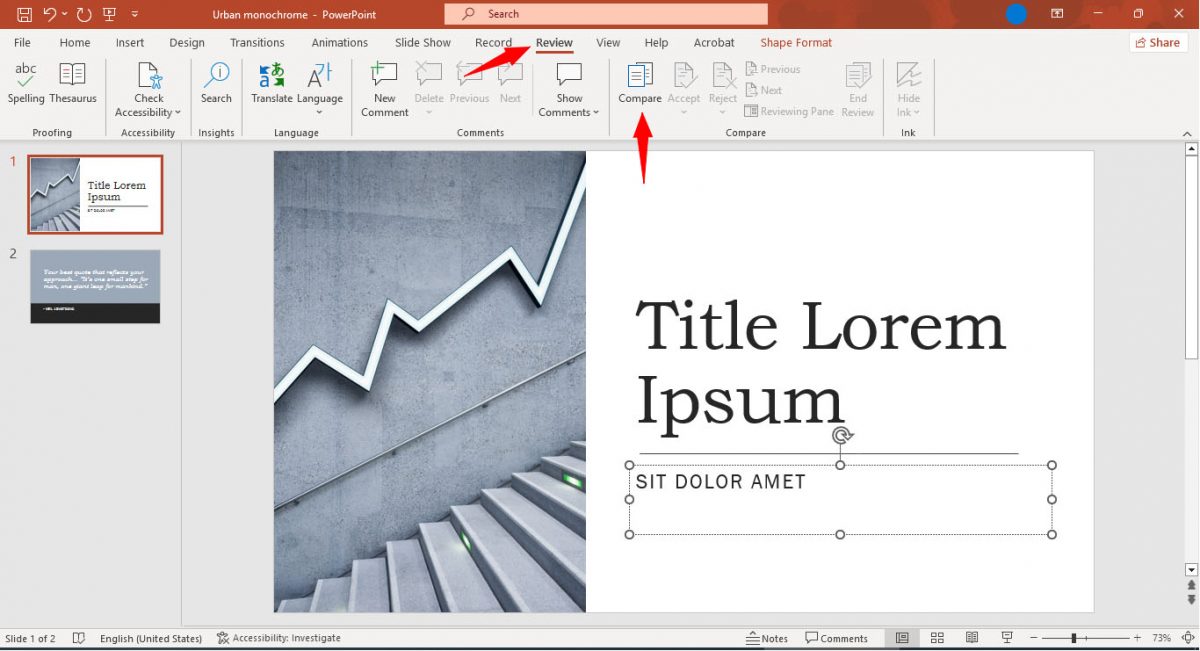
To track changes, you will need the source file copy and the reviewed file copy. Once you have both files, open the reviewed file and then click on the review tab at the top. Select compare from the compare group at the top. You will then be asked for the location of the source file. Select the source file and then click merge.
Upon merging, both presentations will be compared, and a new revisions pane will open up. This pane will state all the original and edited files' differences. If there are no changes, the pane will say no changes have been made. You will also be told which slide to skip to so you can see which changes are made.
If there are any changes, a slide changes box will appear in the pane. Upon clicking that box, you will see all the changes made to that slide. This includes everything from spacing changes to adding or removing content.
You can select any of the changes and see who made them. You can even choose to keep the changes or revert to the source file slide. You can also accept individual changes by checking the box next to each change.
Changes Now Easy to Track
With these simple steps, you can now track and collaborate easily using Microsoft PowerPoint. Although the process is not real-time, it helps users understand what changes are made, and they can undo those changes as well.
Thank you for being a Ghacks reader. The post How to Track Changes in a Microsoft PowerPoint Presentation? appeared first on gHacks Technology News.


![Razer Cortex crashing games on PC [Fix]](https://lh3.googleusercontent.com/blogger_img_proxy/AEn0k_vdNaCM4w_tQMqy5gemSagy6DyANXyN0zrzXYNxK1Qb4jcWLxK4QvOc7KRsW1yrypkvF9fUIva3FNeJXP1mkoBe5-72QrGgNqoJPE9UQCMTu58tjWPOnfR2V0Gc7umVf-SdEnViKKCgL2fxtkzZEiqmQBo_WQMRDeVDYCgOZVzQI0Ts=w680)
![DeepSeek Verification code not received [Fix]](https://lh3.googleusercontent.com/blogger_img_proxy/AEn0k_tQ5KENJHCKNWHZvKbTi2kOiqJD84pVaTY0vZcC5Z1oOjRV-ZzcHFow-2iaMyVPCQB0YGRIPHEYnP_ABc9NwFazSXCt8HToUed9IMIUWXBB1JxTCymwwkl-cdsgISebB17pEnqajDrI3Zh_LY1UwmaZz9p-ozR-OTE4YTd8E1FGld_79qQQzUoizKP3JA=w680)


0 Commentaires