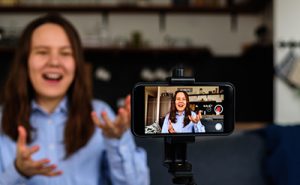
Select Your Approach
What are you recording?
- Zoom Presentation
- Testimonial
- Interview
- Short Talk Video (no presentation)
If your video includes a slide show, decide whether to record yourself speaking so that the audience sees you as a frame-in-frame thumbnail or to record just the slide deck with a voiceover
What are you recording with?
- Zoom – Simple instructions are provided below.
- Smartphone – Whether you’re using an iPhone, Android, or other phone, explore your camera settings to record video.
- Laptop – Laptops will typically require some type of application to launch the camera and start recording. Zoom provides a simple solution.
Camera Settings
- Make sure you are recording in the right format: 1080p at 30fps, 1080p at 60fps, or 1080p at 24fps. 720p and 4k is fine too.
Find more tips from NYU Resources
Location & Setting
Whichever approach you choose, be sure that the room in which you record is quiet. Ideally, it should be closed to other people, pets, etc.
If you decide to film yourself, take a moment to prepare so that:
- The background is appealing
- Avoid cluttered locations and empty walls
- Perhaps opt for something like a bookcase, a wall with a few pictures, or a plant
- A good light source is facing you, so that your face is well lit
- Try shooting during daylight if possible
- Avoid overhead lights
- A window or a lamp generally works well
- Avoid sitting with a light source behind you, as that puts your face in shadow
- You’re dressed for success.
- Make sure your clothing does not blend in with you background
- Remove your glasses so there’s no glare from either the light or your computer screen
- Avoid Patterns (stripes, plaids, polka dots), shiny fabrics, noisy jewelry, visible logos (unless it’s IEEE or IEEE Computer Society related), wrinkles, all white or black clothing
- The webcam should be at about eye level.
-
- Try putting your laptop on a box or stack of books to raise the camera if needed
- Keep contact with the camera at all times
- Sit so that you’re framed within the screen with just a little space between the top of your head and the top of the screen. Something like this:

A Couple of Tips
- If you wear glasses, make sure to remove them. The glare from the computer screen may distract the audience watching your video.
- If you’ve written a script, consider using a teleprompter app such as CuePrompter, PromptDog, and Promptsmart to avoid looking up and down from the camera.
- After hitting record, make sure to pause for five seconds before speaking
When Answering Prompts
- Rephrase questions by including them in your answer instead of starting with your response
- Pause between responses
- Avoid “so’s” and “um’s”. Start and end your responses definitively
- If an unexpected noise interrupts your recording, we suggest to restart the recording
When Doing Zoom Recordings

- Click the Start Video button.
- Select Speaker View (usually near the top of the screen).
- Be sure the Participants list and Chat window are both closed. Click on those buttons in the toolbar if they’re open.
- Click Full Screen view.
- With your presentation file open, click the Share Screen button in the toolbar.
- Select the application to share. (For example, Acrobat Reader or PowerPoint.) If you’re using PowerPoint, you can use the Slide Show view and Fullscreen mode.
- When ready to begin, click the ‘More’ button in the toolbar and select “Record on this Computer.”
- Once you’re done, click the … More button in the toolbar and choose “Stop Recording.”
The file will be saved to your computer after you click the End Meeting button.
Note: If you need to read notes, you’ll need a second monitor, or else print out the text to read for the voiceover track. If you print them, remember that the mic will capture the sound of rustling paper.
- If enabled on your account, you can turn on automated captioning by clicking the Live Transcript button and selecting Enable Auto-Transcription.

0 Commentaires